 Save to Pinterest
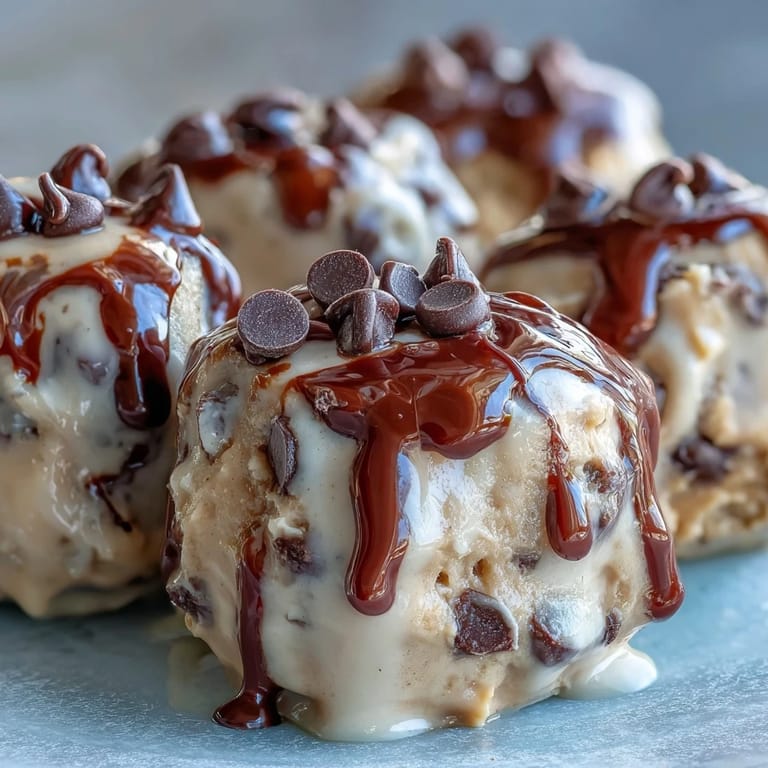
 My neighbor knocked on my door one afternoon with a container of these frozen peanut butter bites, and I was instantly hooked—creamy, protein-packed, and tasting more like dessert than health food. She'd made them on a whim using Greek yogurt and honey, and I remember thinking how simple yet clever the whole thing was. That same week, I started experimenting in my own kitchen, adding chocolate chips one batch and swirling dark chocolate through another. Now they're my go-to when I need something sweet but substantial, and I've learned a few tricks along the way that make them even better.
I brought a batch to my book club last month, and watching everyone's faces light up as they bit into one was priceless—one friend immediately asked if she could take extras home for her kids. What struck me most was how people kept reaching for just one more, commenting that they couldn't believe something so good for you could taste this good. That's when I knew these bites had moved from my personal experiment to something worth perfecting and sharing.
Ingredients
- Plain Greek yogurt (1 cup): Full-fat gives creamier bites, but low-fat works too if you prefer lighter—the tanginess balances the sweetness beautifully.
- Creamy natural peanut butter (½ cup): Skip the brands with added sugars and oils; you want the kind where the only ingredient is peanuts, maybe salt.
- Honey (2 tablespoons): This is your sweetener and binder, though maple syrup swaps in seamlessly if you're vegan.
- Mini chocolate chips, chia seeds, vanilla extract, and cinnamon: Optional but worth having on hand—they're what turn a basic bite into something with personality.
- Add-in variations like mashed berries, crushed nuts, or melted chocolate: These let you customize every batch, which is half the fun of making them.
Tired of Takeout? 🥡
Get 10 meals you can make faster than delivery arrives. Seriously.
One email. No spam. Unsubscribe anytime.
Instructions
- Mix your creamy base:
- Combine Greek yogurt, peanut butter, and honey in a bowl, whisking until the mixture is completely smooth—no streaks of peanut butter hiding at the bottom. This takes about a minute, and you'll notice the texture becomes lighter and fluffier as you whisk.
- Add your flavor layers:
- Stir in vanilla and cinnamon if you're using them, tasting as you go so you know exactly what you're creating. This is your moment to decide if you want subtle warmth from spices or if you'd rather let the peanut butter shine.
- Prepare your molds:
- Line a mini-muffin tin with paper liners or use silicone molds—they make release so much easier. If you're using a tin without liners, a light grease does the job.
- Portion with confidence:
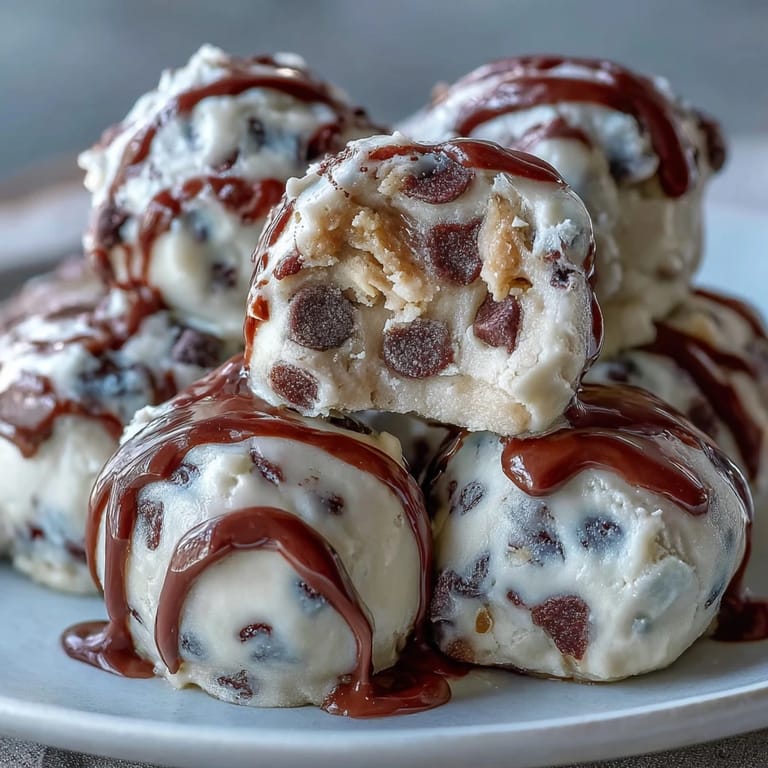
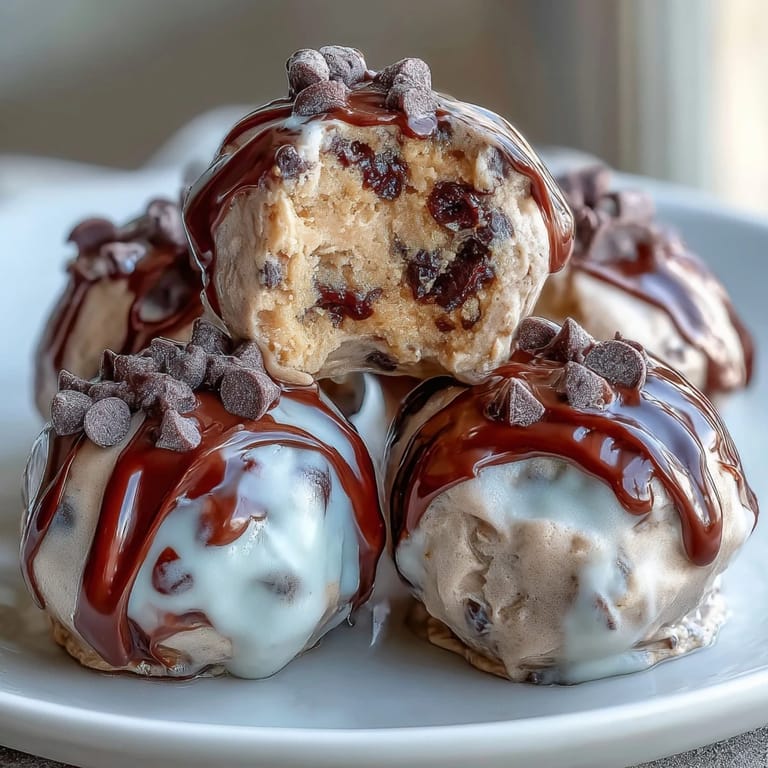
- Spoon about a tablespoon of mixture into each cavity, using the back of the spoon to press it down slightly so it holds together. You're aiming for roughly 18 to 20 bites depending on your tin size.
- Top before freezing:
- Add your chosen toppings now—chocolate chips, chia seeds, crushed berries—since they'll freeze into place and won't shift around. If you're doing a chocolate swirl, drizzle a tiny bit over each bite and use a toothpick to create gentle lines before everything sets.
- Freeze until solid:
- Pop the tray into the freezer for at least 2 hours, though overnight is even better if you have the time. You'll know they're ready when they feel rock-hard to the touch.
- Release and store:
- Run warm water over the bottom of the tray for just a few seconds—not too long or they'll start melting—then gently push each bite out from below. Transfer them to a freezer-safe container or bag where they'll keep for up to two weeks.
 Save to Pinterest
 I made these for my sister after she'd been stressed about finding healthy snacks that didn't taste like cardboard, and she actually came back asking for the recipe. It felt like more than just sharing food—it was sharing something I'd figured out through trial and error, a small way of looking out for her.
Customization Is Your Secret Weapon
The beauty of these bites is that they're a platform for whatever sounds good to you that day. One week you might crave berries folded into the base, the next week you're doing a granola crunch topping, and the week after that you're swirling in melted chocolate like you're making fancy truffles. I've learned that keeping the base simple and constant while playing with toppings keeps things interesting without making the recipe feel complicated.
Timing and Texture Matter
Straight from the freezer, these have a texture somewhere between ice cream and a frozen yogurt bite—dense but creamy. I used to eat them hard as rocks, but then I discovered that letting them sit at room temperature for just 2 minutes softens them to this perfect sweet spot where they're still cold but almost melt-in-your-mouth.
Serving and Storage Wisdom
These are perfect with your morning coffee, as a post-workout protein boost, or honestly just as a guilt-free dessert when you want something sweet after dinner. They pair beautifully with fresh fruit if you want to feel like you're being extra healthy, and they also double as impressive little treats to bring to gatherings.
- Make a double or triple batch on a Sunday afternoon and you'll have snacks ready for the entire week.
- If you dip them in melted chocolate and freeze again, they taste like fancy homemade candy.
- Store them in a container where they won't get buried under frozen vegetables—they deserve their own little spot.
 Save to Pinterest
 These little bites have become my answer to the snack dilemma—healthy enough to feel good about, delicious enough to actually crave. Keep them in your freezer and you'll find yourself reaching for them way more often than you expected.
Recipe FAQs
- → Can I substitute peanut butter with other nut butters?
Yes, almond or cashew butter can be used as alternatives, offering slightly different flavors while maintaining creamy texture.
- → How long should I freeze the bites?
Freeze the mixture for at least 2 hours or until completely solid for the best bite consistency.
- → Are there options to make it vegan?
Replace honey with maple syrup and ensure the yogurt is plant-based to create a vegan-friendly version.
- → What optional add-ins can enhance flavor or texture?
Mini chocolate chips, chia seeds, vanilla extract, cinnamon, mashed berries, or crushed nuts add variety and depth.
- → How should I store these frozen bites?
Keep them in a freezer-safe container or bag for up to two weeks to maintain freshness and flavor.
- → Can these be served alongside other foods?
Yes, they pair well with fresh fruit or coffee, making a balanced and enjoyable snack option.