 Save to Pinterest
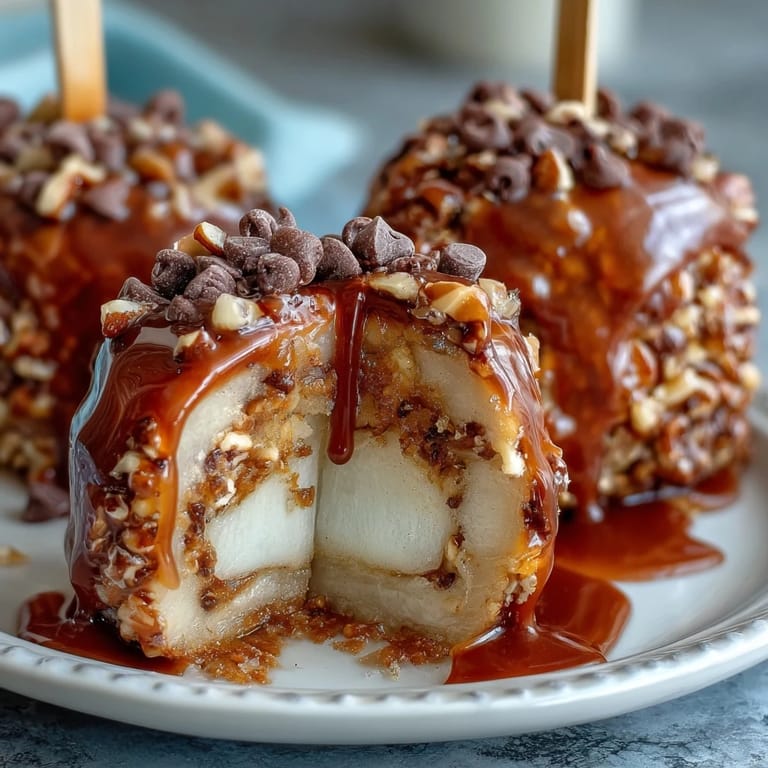
 I discovered these caramel apple slices while volunteering at a county fair, standing behind a booth watching kids' faces light up as they bit into the crispy, gooey combination. There was something magical about how simple ingredients could transform into something that felt like a celebration on a stick. That afternoon, I went home determined to recreate that magic in my own kitchen, and after a few sticky attempts, I nailed it. Now they're my go-to when I need something that looks impressive but requires almost no special skills.
Last summer, I brought a batch to my neighbor's garden party, expecting them to sit politely on a dessert table while everyone mingled. Instead, they disappeared within minutes, and three people asked for the recipe before I'd even finished my first slice. Watching my friend Sarah's daughter hold one up like a tiny trophy, with caramel stuck to her chin and a grin wider than her face, reminded me why I bother cooking at all.
Ingredients
- Apples: Choose crisp varieties like Granny Smith or Honeycrisp because they hold their shape and provide that essential tartness that keeps the sweetness from becoming cloying—soft apples will turn to mush and ruin the whole experience.
- Soft caramels: The individually wrapped kind makes your life infinitely easier, and unwrapping them is oddly meditative; don't use caramel sauce from a jar as it won't set properly and you'll end up with a sticky mess.
- Heavy cream: This is the secret to smooth, pourable caramel that clings to the apple instead of sliding off—it's worth using real cream here.
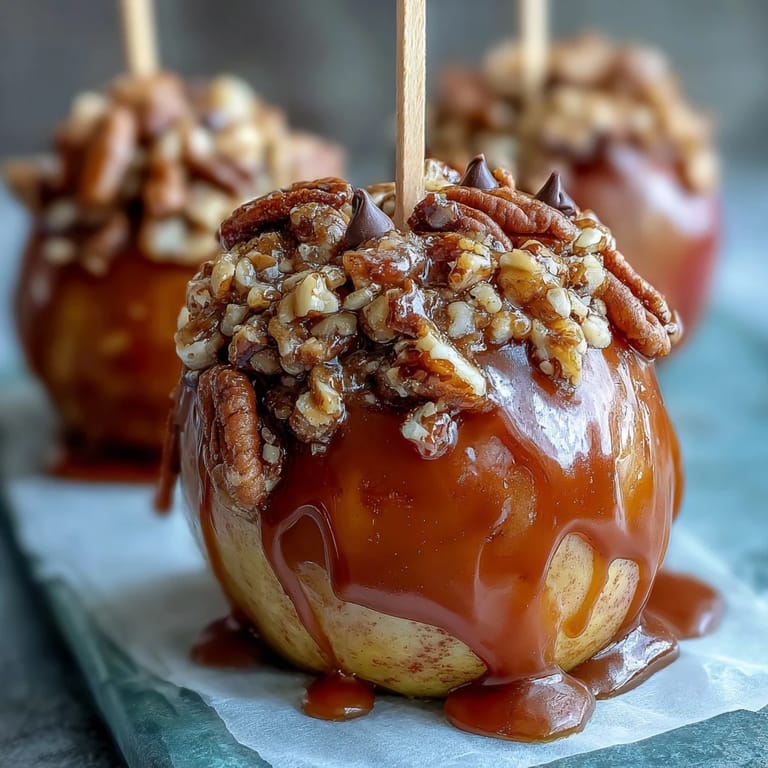
- Roasted salted peanuts: Crush them finely so they adhere to the caramel, and that little hit of salt is what makes people keep coming back for another bite.
- Mini chocolate chips: Optional, but they add a sophisticated touch and prevent the coating from feeling one-dimensional.
- Flaky sea salt: Use this sparingly over chocolate-topped versions for a professional finish that makes everyone assume you went to culinary school.
- Wooden sticks: Get the thicker ones because thinner sticks can snap under the weight of a caramel-coated apple, and nothing's more disappointing than your creation taking a nosedive.
Tired of Takeout? 🥡
Get 10 meals you can make faster than delivery arrives. Seriously.
One email. No spam. Unsubscribe anytime.
Instructions
- Prep your station:
- Line your baking sheet with parchment paper or a light spray of nonstick coating—this prevents sticking and makes cleanup feel like less of a punishment. Having everything within arm's reach before you start means you won't be fumbling while caramel hardens.
- Slice and stabilize:
- Cut apples into thick rounds (about a half-inch), remove the core from each slice with a small knife, and pat them completely dry. The drier your apples, the better the caramel will stick, so don't skip this step even though it feels unnecessary.
- Insert the sticks:
- Push a stick into the bottom of each slice about halfway through, angling slightly so it's secure but won't poke through the top. Test one by giving it a gentle tug to make sure it won't spin or fall out during the dipping process.
- Melt the caramel:
- In a small saucepan over low heat, combine unwrapped caramels and heavy cream, stirring constantly—this usually takes 3 to 4 minutes and smells absolutely intoxicating. You'll know it's ready when the mixture is completely smooth with no lumps and flows like warm honey.
- Coat with caramel:
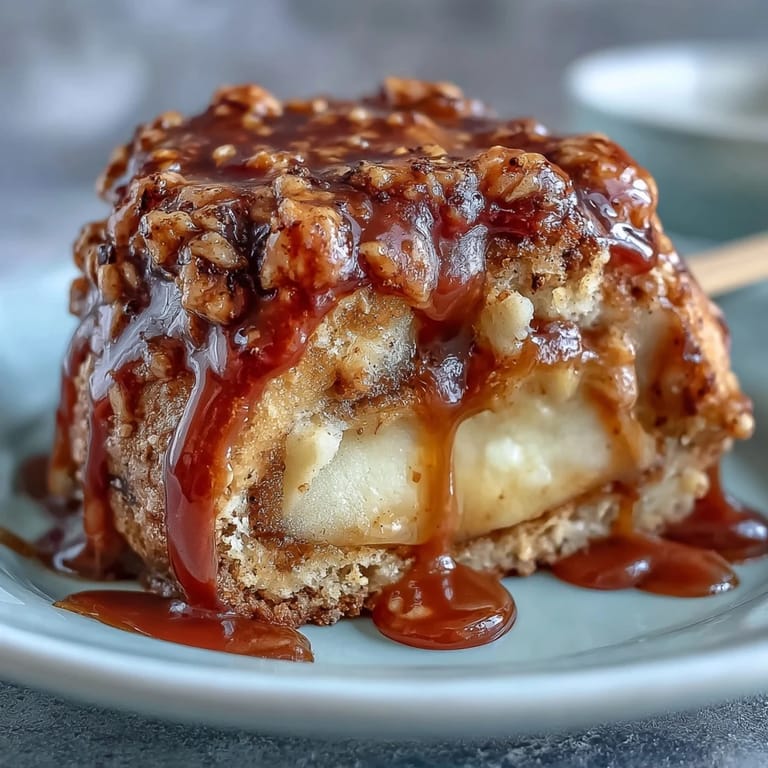
- Working quickly while the caramel is still warm, dip each apple slice into the mixture, letting excess drip off for a few seconds. Use a spoon to help coat any bare spots on the sides, moving with confidence so the caramel sets evenly.
- Add your toppings:
- Immediately sprinkle crushed peanuts over the wet caramel or dip the entire slice into a shallow bowl of crushed nuts—timing is everything here because once the caramel starts to set, nothing will stick. If using chocolate chips or salt, add those now while everything's still slightly warm.
- Set and serve:
- Place finished slices on your prepared baking sheet and refrigerate for at least 10 minutes until the caramel hardens into a proper coating. They're best enjoyed the same day while the apples are still crisp and the contrast between textures is at its peak.
 Save to Pinterest
 My mom, who isn't particularly sentimental about food, asked me to make these for her office party last fall and came home raving about how her coworkers had actually fought over them. That's when I realized these aren't just a dessert—they're a conversation starter, a small moment of joy that costs almost nothing to make.
Choosing Your Apple Variety
I learned the hard way that texture matters enormously here. The first time I used Fuji apples, they were too soft and turned mealy against the caramel, while Red Delicious varieties were somehow mushy on the inside but refused to cut cleanly. Granny Smiths win because they're firm, tart enough to balance the sweetness, and cut like a dream; Honeycrisp works beautifully if you prefer something slightly sweeter and still sturdy.
Customizing Your Toppings
The beauty of this recipe is that it adapts to whatever you have on hand or whatever dietary needs your guests have. I've made nut-free versions using crushed pretzels for that essential crunch, which actually adds a salty-sweet dimension that's unexpectedly sophisticated. Dark chocolate and sea salt feels fancy but takes zero extra effort, while sprinkles and white chocolate chips lean into a more playful, almost nostalgic vibe.
Storage and Timing Tips
These are absolutely best eaten the day you make them, when the apple is crisp and the contrast between textures is at its most satisfying. If you must make them ahead, store them in an airtight container in the refrigerator for up to 24 hours, though the apple will soften slightly and the coating can get sticky in humidity.
- Don't refrigerate uncovered or they'll absorb moisture and the caramel coating will weep—humidity is the real enemy here.
- Let them sit at room temperature for 5 minutes before serving so the caramel loosens up and isn't brittle cold.
- If you're bringing these to a party, transport them flat in a single layer and assemble them just before serving for maximum impact.
 Save to Pinterest
 There's something deeply satisfying about making a dessert that tastes like an indulgence but asks almost nothing of you in return. These slices have become my answer when someone asks me to bring something to a gathering, because I know they'll disappear and people will remember them.
Recipe FAQs
- → What type of apples work best for the slices?
Crisp, firm apples like Granny Smith or Honeycrisp are ideal for holding their shape and providing a balance of sweet and tart flavors.
- → How can I melt the caramel for coating?
Gently melt caramels with heavy cream over low heat while stirring constantly until smooth and creamy to ensure an even coating.
- → Can the crushed peanuts be substituted?
Yes, alternatives like crushed pretzels, sprinkles, or mini chocolate candies can be used for different textures and flavors.
- → What is the best way to serve these apple slices?
Serve chilled shortly after coating to maintain the caramel’s firmness and the peanuts’ crunch.
- → How do the popsicle sticks improve the presentation?
Inserting sticks into each slice makes them easy to hold and eat, ideal for parties or snacks on the go.