 Save to Pinterest
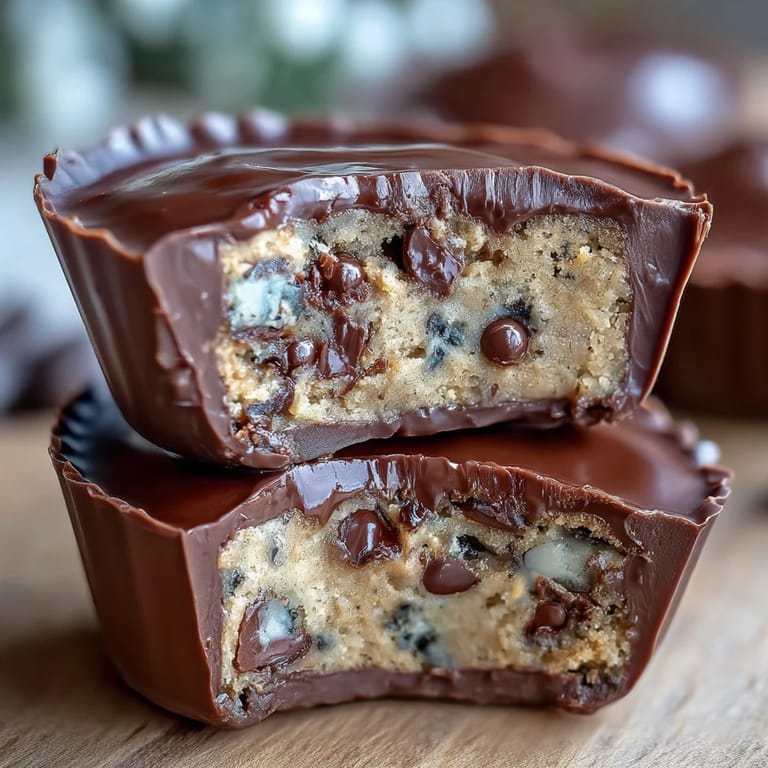
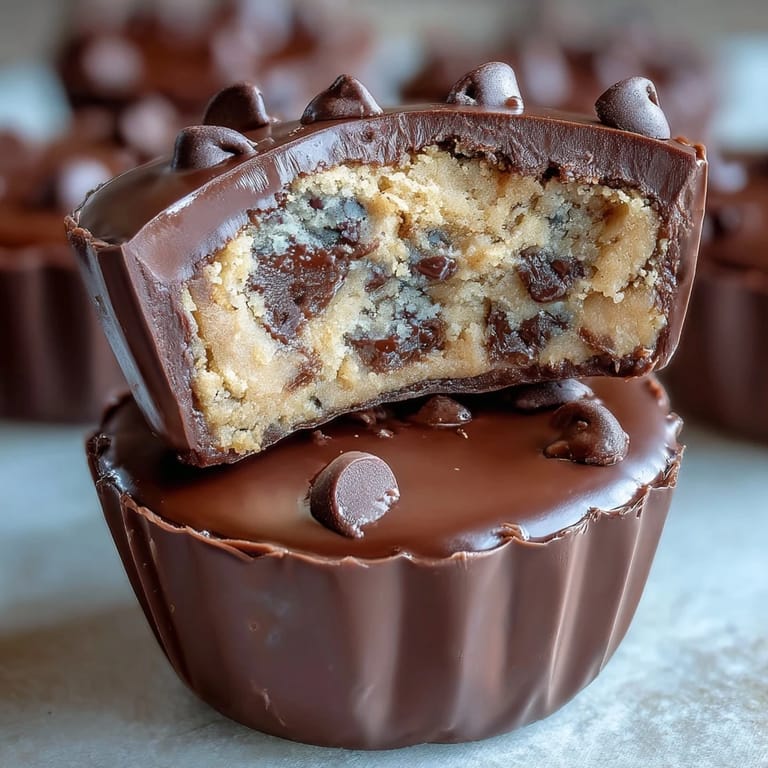
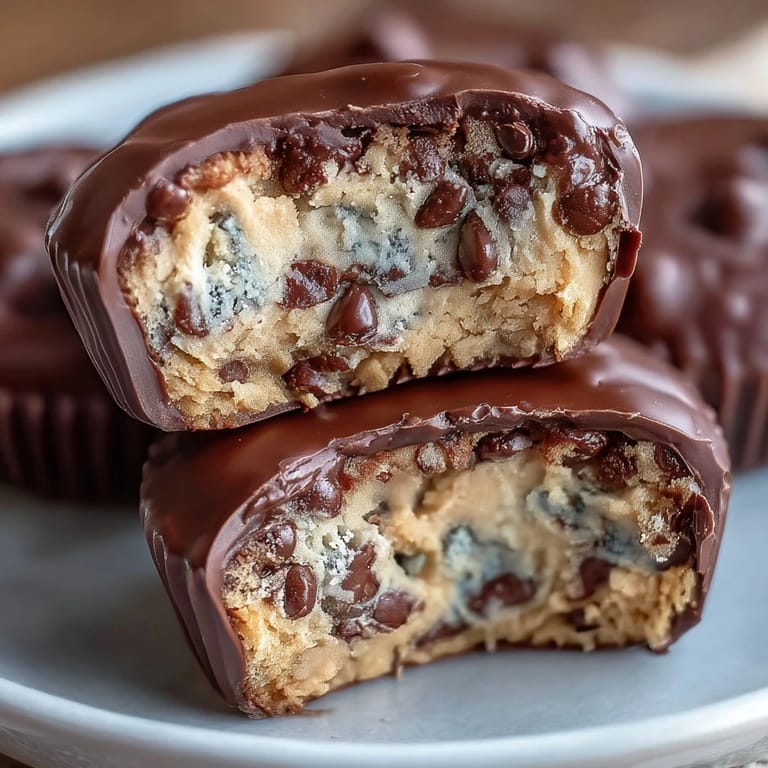
 There's something about the combination of peanut butter and chocolate that feels like pure indulgence, and one afternoon while scrolling through my phone, I found myself craving the nostalgia of candy shop peanut butter cups but with a twist. What if I could layer in actual cookie dough—the part everyone sneaks a taste of anyway? That's when this recipe took shape, and the first batch I made had my kitchen smelling like a bakery collided with a chocolate factory. My hands were sticky, my countertop had melted chocolate smudges, and somehow it all felt exactly right.
I made these for a friend's birthday potluck last spring, and watching people's faces when they bit through the chocolate to find cookie dough inside was genuinely my favorite part of the whole evening. One person actually closed their eyes and went quiet for a second, which is the highest compliment any dessert can receive. That moment reminded me why I love cooking—it's about creating little surprises that make people feel something.
Ingredients
- Unsalted butter (1/4 cup softened, 2 tbsp melted): You need softened butter for the cookie dough so it creams smoothly, and melted butter for the peanut butter layer to bind everything together richly.
- Light brown sugar (1/4 cup packed) and granulated sugar (2 tbsp): Brown sugar brings moisture and molasses depth to the cookie dough, while the granulated sugar helps with structure.
- Vanilla extract (1/2 tsp): This is your secret flavor booster that makes the dough taste like a real cookie rather than just flour and butter.
- Milk (1 tbsp): A small splash keeps the dough tender and prevents it from becoming too crumbly as it sits.
- All-purpose flour (1/2 cup, heat-treated): Heat-treating eliminates any bacteria in raw flour, making this safe to eat uncooked—this is non-negotiable for peace of mind.
- Salt (1/4 tsp plus pinch): Tiny amounts of salt enhance every layer by balancing sweetness and bringing out deeper flavors.
- Mini chocolate chips (1/3 cup): Mini chips distribute throughout the dough evenly, giving you chocolate in every bite without overwhelming the texture.
- Creamy peanut butter (1/2 cup): Choose a quality brand you'd eat straight from the jar; this is the backbone of your peanut butter layer.
- Powdered sugar (1/4 cup): This sweetens and lightens the peanut butter layer, making it less dense and more cake-like in texture.
- Semisweet or milk chocolate chips (2 cups): The chocolate coating is your final say in flavor; pick whichever you reach for most often when snacking.
- Coconut oil or vegetable oil (2 tsp): A small amount of oil thins the melted chocolate just enough to coat smoothly without seizing up.
Tired of Takeout? 🥡
Get 10 meals you can make faster than delivery arrives. Seriously.
One email. No spam. Unsubscribe anytime.
Instructions
- Make Your Cookie Dough Base:
- In a medium bowl, cream together softened butter, brown sugar, and granulated sugar until the mixture looks pale and fluffy, which should take a couple of minutes with a mixer. Mix in vanilla and milk until incorporated, then add your heat-treated flour and salt, stirring just until you don't see any dry spots, and fold in those mini chocolate chips as gently as you would handle something precious.
- Prepare Your Workspace:
- Line your 12-cup muffin tin with paper liners, making sure they sit flat and centered so your cups come out neat. Set this aside within easy reach because you'll move through the next steps with purpose.
- Melt Chocolate with Care:
- In a microwave-safe bowl, combine chocolate chips with coconut oil and heat in 30-second bursts, stirring between each one to avoid overheating the chocolate. When it's smooth and glossy, you're done—don't push it further or it will seize.
- Build Your First Chocolate Layer:
- Spoon roughly 1 tablespoon of melted chocolate into each liner, then tilt and tap the muffin tin so the chocolate coats the bottom evenly. Slide the whole tin into the freezer for 10 minutes while you tackle the next layer.
- Whip Your Peanut Butter Layer:
- In a clean bowl, stir together peanut butter, melted butter, powdered sugar, and a pinch of salt until the mixture is completely smooth and spreadable. This layer is what holds everything together, so don't skip the mixing step.
- Layer the Peanut Butter:
- Remove the muffin tin from the freezer and drop a heaping teaspoon of peanut butter mixture into each chocolate cup, then flatten it slightly with the back of your spoon. You're creating a stable surface for the cookie dough to sit on.
- Add Your Cookie Dough Surprise:
- Scoop about 1 teaspoon of chilled cookie dough and gently press it onto the peanut butter layer in each cup, making sure it's nestled in there but not crammed. This is the moment where your cups go from good to memorable.
- Seal with Chocolate:
- Top each cup with enough remaining melted chocolate to cover all the fillings completely, then smooth the tops gently so they look like you bought them at a fancy shop. Work quickly so the chocolate doesn't set before you're finished.
- Final Chill:
- Slide the tin into the fridge or freezer for at least 20 minutes until everything feels solid when you touch it. Once set, pop them out of the liners and store them in an airtight container in the refrigerator where they'll keep for up to two weeks if they last that long.
 Save to Pinterest
 These peanut butter cups became my answer to expensive store-bought chocolate when I wanted to give gifts that felt personal and tasted like someone cared enough to make them. The fact that they require no baking, just patience and a freezer, felt like a secret I wanted to keep until I made them for the third time and realized I should probably share this.
Why These Work as Gifts
Homemade peanut butter cups look impressive on first glance but feel approachable once you understand they're just layering with a muffin tin. I've packaged them in small boxes with parchment paper, tied with twine, and watched people's reactions shift from polite to genuinely delighted the moment they unwrap them. They feel special because they are, and that's the kind of effort that registers even for people who have everything.
Flavor Variations That Changed Everything
Once I nailed the basic version, I started experimenting, and that's when this recipe really became mine. Dark chocolate transforms the whole experience into something more sophisticated and less sweet, while a tiny sprinkle of flaky sea salt on top before the final chill adds a contrast that makes people pause and ask what's different about yours. You can also try almond or oat milk in the cookie dough for a dairy-free version, though I'll admit the original tastes like butter dreams.
Storage and Make-Ahead Magic
These are actually better when you make them a day or two ahead because the flavors settle and the layers merge into one cohesive experience rather than feeling separate. They live happily in the refrigerator for up to two weeks in an airtight container, though honestly they usually don't last that long in my house. You can also freeze them for up to a month if you want to get ahead, which is perfect for when you suddenly need a gift or a small indulgence at midnight.
- Let them sit at room temperature for a couple of minutes before eating so the chocolate isn't brittle and the peanut butter is creamy.
- If your kitchen is warm, store these in the fridge rather than the counter or they'll start to soften and lose their shape.
- Make a double batch next time because you'll immediately wish you had more.
 Save to Pinterest
 These cookie dough peanut butter cups remind me that the best desserts are the ones you make for yourself first, then share when you realize how good they are. There's something deeply satisfying about combining store-bought simplicity with homemade heart.
Recipe FAQs
- → How do I safely use raw flour in the cookie dough?
Heat-treat the flour by microwaving it on high for 1 minute, stirring halfway, or baking it at 350°F (175°C) for 5 minutes to eliminate any bacteria.
- → Can I substitute the peanut butter for a different nut butter?
Yes, almond or cashew butter can be used, but this may slightly alter the taste and texture.
- → What is the best way to melt the chocolate for coating?
Melt chocolate chips with coconut or vegetable oil in 30-second intervals in the microwave, stirring between bursts until smooth.
- → Is chilling necessary for the peanut butter cups?
Chilling solidifies each layer, ensuring the cups hold their shape and deliver the intended texture.
- → Can these be made dairy-free?
Yes, substituting almond or oat milk in the cookie dough and choosing dairy-free chocolate makes this suitable for dairy-free diets.