 Save to Pinterest
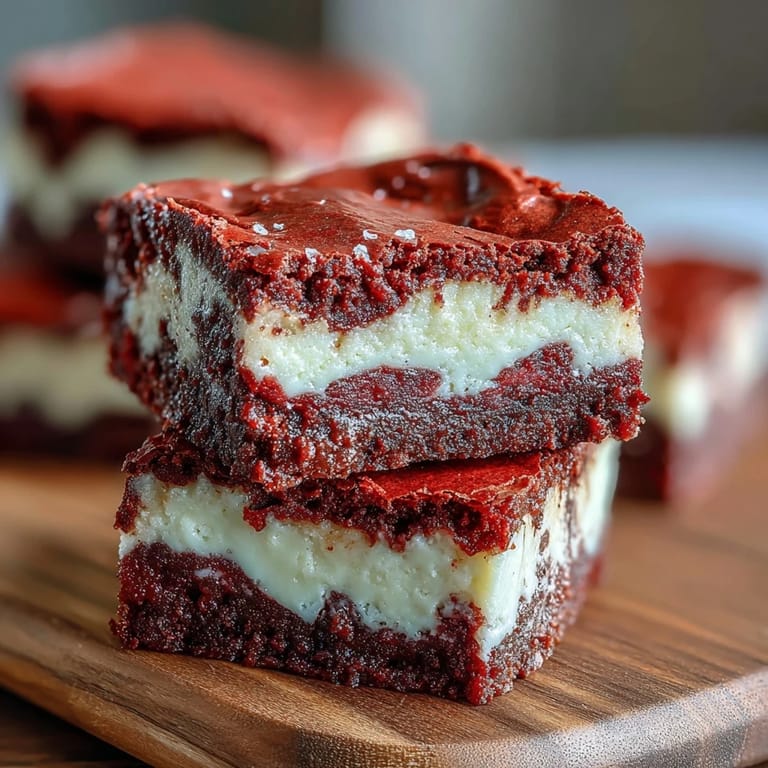
 My neighbor brought these to a block party last spring, and I watched them disappear before the potato salad even showed up. The contrast between the fudgy red velvet and tangy cheesecake had everyone asking for the recipe. I went home that night determined to figure it out, and after a few tries, I landed on this version that gets the balance just right. Now they're my go-to when I need something that looks impressive but doesn't require pastry school skills.
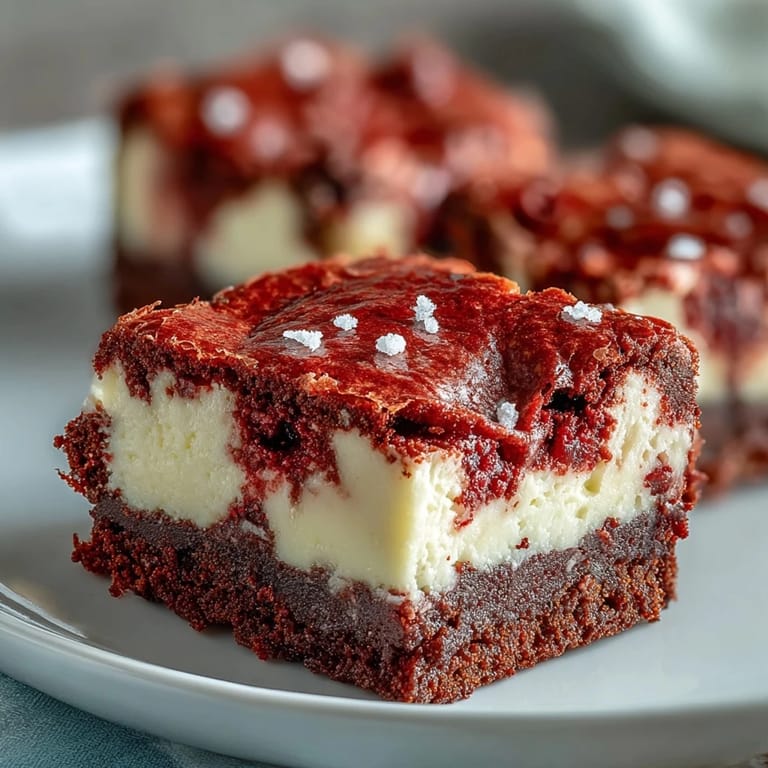
The first time I made these for my book club, I panicked halfway through because the batter looked too thick. I almost added milk, but something told me to trust the process. When I pulled them out of the oven, those swirls had set into glossy ribbons that looked like I'd planned every curve. My friend Sarah took a photo before she even tasted one, which is the highest compliment in our group.
Ingredients
- Unsalted butter: Melted butter gives you that dense, fudgy texture instead of cakey brownies, and using unsalted means you control the salt level perfectly.
- Granulated sugar: This amount creates just enough sweetness without making the brownies cloying, especially with the tangy cheesecake on top.
- Eggs: Room temperature eggs blend smoothly into the batter without streaking, and they help the layers set without drying out.
- Red food coloring: Gel works better than liquid because it gives you vibrant color without thinning the batter, but either works if that's what you have.
- All-purpose flour: A small amount keeps these fudgy rather than cake-like, so resist the urge to add more even if the batter looks thin.
- Unsweetened cocoa powder: Just enough to give that subtle chocolate hint that makes red velvet taste like red velvet, not just red cake.
- Cream cheese: Softened to room temperature is non-negotiable here, or you'll have lumps no amount of beating will fix.
- Vanilla extract: It goes in both layers and ties the flavors together, making everything taste more intentional.
Tired of Takeout? 🥡
Get 10 meals you can make faster than delivery arrives. Seriously.
One email. No spam. Unsubscribe anytime.
Instructions
- Get Your Oven Ready:
- Preheat to 175°C and line your pan with parchment, leaving enough overhang to lift the whole thing out later. This one step will save you from scraping brownies out in crumbled pieces.
- Mix the Red Velvet Base:
- Whisk melted butter and sugar until it looks glossy, then add eggs, vanilla, and food coloring until everything is one uniform crimson color. Sift in the dry ingredients and fold just until you stop seeing flour streaks.
- Hold Back Some Batter:
- Scoop out a quarter cup of that red batter into a small bowl and set it aside. Spread the rest evenly in your pan, making sure it reaches the corners.
- Whip Up the Cheesecake:
- Beat softened cream cheese until it's completely smooth, then add sugar, egg, and vanilla. Keep beating until it's silky with no lumps, because those won't disappear in the oven.
- Layer and Swirl:
- Pour the cheesecake mixture over the red velvet base and spread it gently. Drop spoonfuls of that reserved red batter on top, then drag a knife through in figure-eights to create swirls.
- Bake Until Just Set:
- Bake for 35 minutes until the center barely jiggles and a toothpick comes out with moist crumbs, not wet batter. The cheesecake will firm up as it cools, so don't overbake.
- Cool and Chill:
- Let them cool completely in the pan, then refrigerate for at least two hours. Cold brownies cut cleanly into perfect squares instead of gooey smears.
 Save to Pinterest
 My sister requested these for her birthday instead of cake last year, and we sat on her back porch eating them straight from the pan with forks. The sun was setting, we were laughing about something dumb, and those brownies tasted better than anything I'd ever made in a proper kitchen. Sometimes the best recipes are the ones that don't need fancy presentation, just good company and a willingness to share.
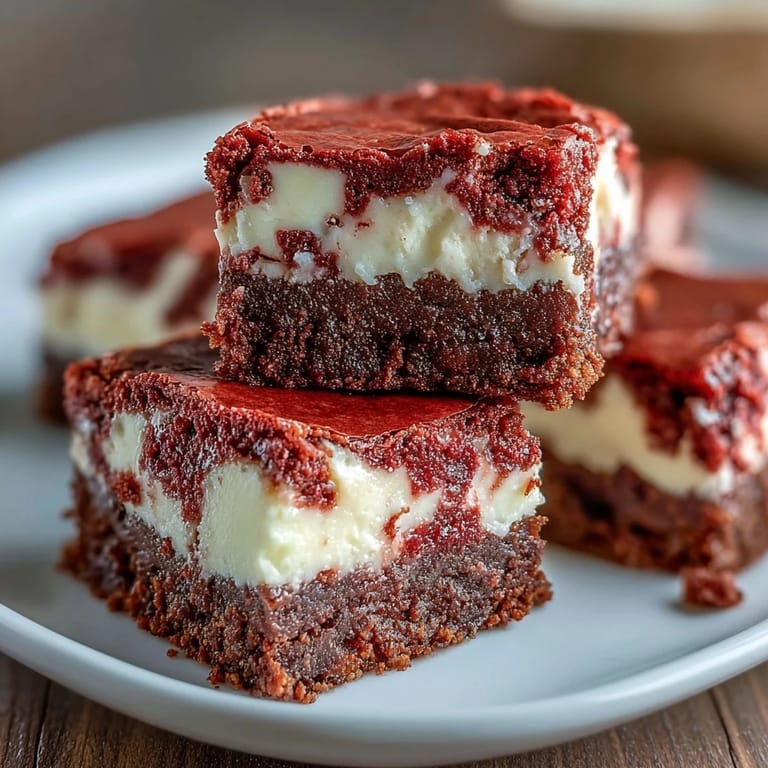
Getting the Swirl Right
The swirl is more forgiving than it looks, but there is a technique. Drop the reserved batter in dollops across the surface, spacing them out like you're making a polka dot pattern. Then take a butter knife or skewer and drag it through in long S-curves, pulling the red into the white without overworking it. Three or four passes is plenty, because too much swirling just muddles everything into one color. The goal is distinct ribbons, not marble.
Storage and Make-Ahead Magic
These actually taste better the next day after the flavors have married in the fridge. I make them every time I need to bring something somewhere because they travel well and cutting them cold is so much easier. Keep them in an airtight container with parchment between layers if you're stacking, and they'll stay fudgy for five days. You can also freeze them for up to three months, just thaw in the fridge overnight before serving.
Ways to Make Them Your Own
Once you've made these a few times, they become a base for experimenting. I've stirred white chocolate chips into the brownie batter for extra sweetness, and my cousin swears by adding a handful of chopped pecans to the cheesecake layer. Some people like a cream cheese frosting on top, though I think that tips them into too-rich territory. The beauty of this recipe is that it works perfectly as written, but it also welcomes your ideas.
- Sprinkle mini chocolate chips over the cheesecake before swirling for little pockets of melty chocolate.
- Add a teaspoon of espresso powder to the brownie batter to deepen the chocolate flavor without making it taste like coffee.
- Swap half the cocoa powder for dark cocoa if you want a more intense, almost black, base color.
 Save to Pinterest
 These brownies have become my signature, the thing people expect when I show up with a dish. There's something satisfying about mastering a recipe that looks complicated but comes together in under an hour, and even more satisfying watching people's faces when they take that first bite.
Recipe FAQs
- → Can I use natural food coloring instead of artificial dye?
Yes, you can use natural red food coloring or beetroot powder, though the color may be less vibrant. You may need to adjust the quantity to achieve your desired shade.
- → Why do my brownies need to be refrigerated before cutting?
Refrigeration allows the cheesecake layer to set completely, making the brownies easier to cut cleanly into neat squares without the layers mixing or crumbling.
- → Can I make these brownies ahead of time?
Absolutely! These brownies store beautifully in an airtight container in the refrigerator for up to 5 days, making them perfect for advance preparation for parties or events.
- → What's the best way to create the swirl pattern?
Use a butter knife or wooden skewer to gently drag through the dollops of red velvet batter in a figure-eight or zigzag motion. Avoid over-swirling to maintain distinct marbling.
- → How do I know when the brownies are perfectly baked?
The center should be just set with a slight jiggle, and a toothpick inserted should come out with a few moist crumbs, not wet batter. The edges may pull away slightly from the pan.
- → Can I freeze these brownies?
Yes, wrap individual squares tightly in plastic wrap, then store in a freezer-safe container for up to 3 months. Thaw in the refrigerator overnight before serving.