 Save to Pinterest
 I discovered these bars by accident on a Tuesday afternoon when I was rummaging through the pantry looking for an actual snack. There was overripe banana sitting on the counter, a jar of peanut butter I'd been meaning to use, and a half-full container of oats—and suddenly I realized I didn't need to bake anything at all. Twenty minutes later, I had something chewy and satisfying that tasted like a legitimate treat, not a compromise. My partner grabbed one without asking, then another, and that's how I knew I'd stumbled onto something worth keeping.
I made a batch for a hiking trip once and wrapped them individually in parchment—they stayed fresh for three days in my backpack while we scrambled up a canyon trail. At the summit, when my legs were burning and the wind was picking up, I unwrapped one and remembered why I'd made them in the first place. They taste better when you're standing on a mountain, apparently.
Ingredients
- Ripe bananas: Use ones that are almost embarrassingly soft—the darker the skin, the sweeter they'll be, and you want that natural sweetness doing the heavy lifting for you.
- Creamy peanut butter: The kind that's just peanuts and salt, no added oils or sugars, because this recipe doesn't need the help and you'll taste the difference.
- Honey or maple syrup: Either works beautifully; honey gives warmth, maple adds earthiness—pick based on what's already in your cupboard.
- Vanilla extract: A teaspoon sounds small but it brightens everything, preventing the bars from tasting one-note.
- Old-fashioned rolled oats: The sturdy kind that hold their shape, not the instant stuff that turns into mush—texture matters here.
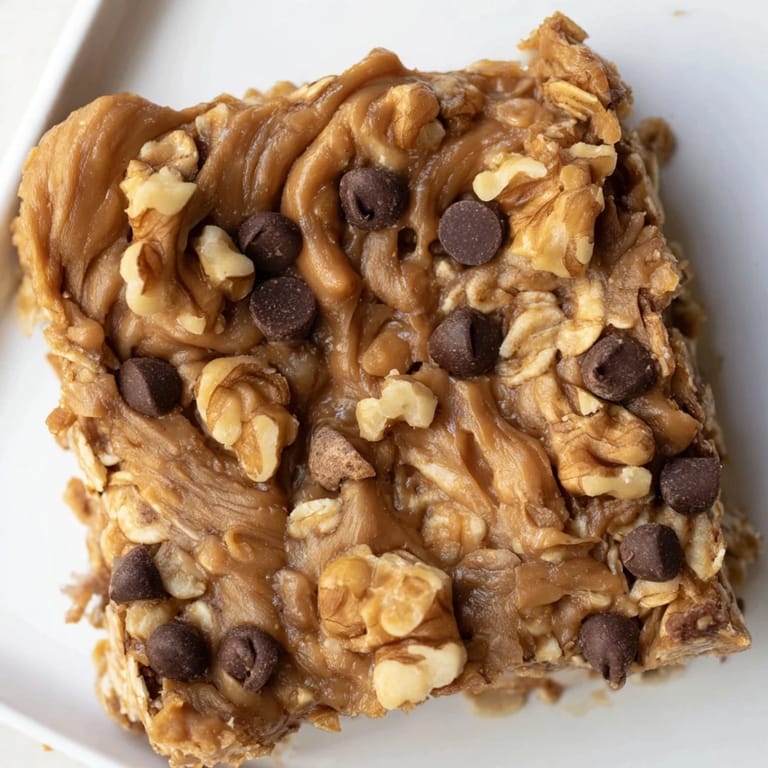
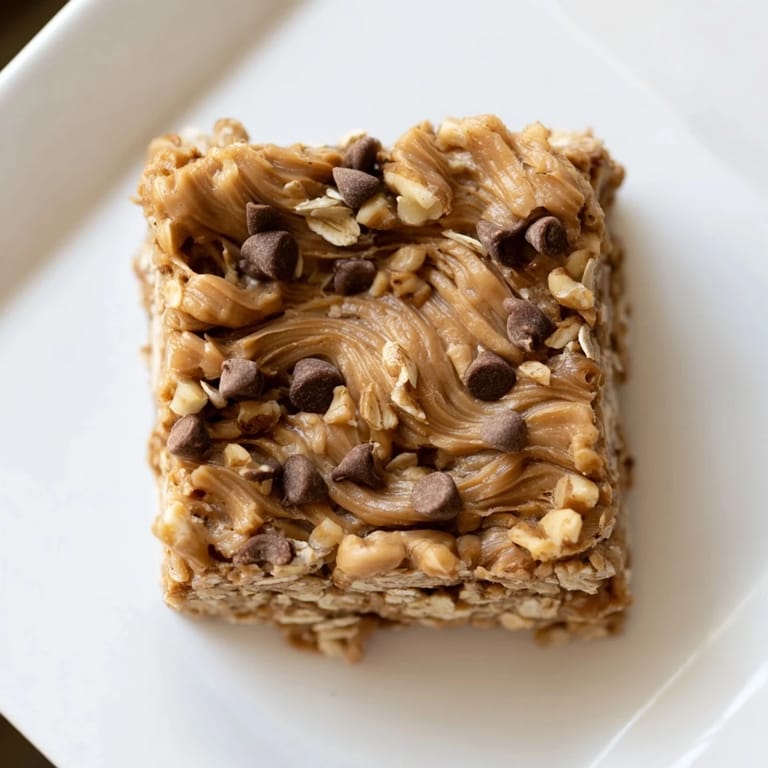
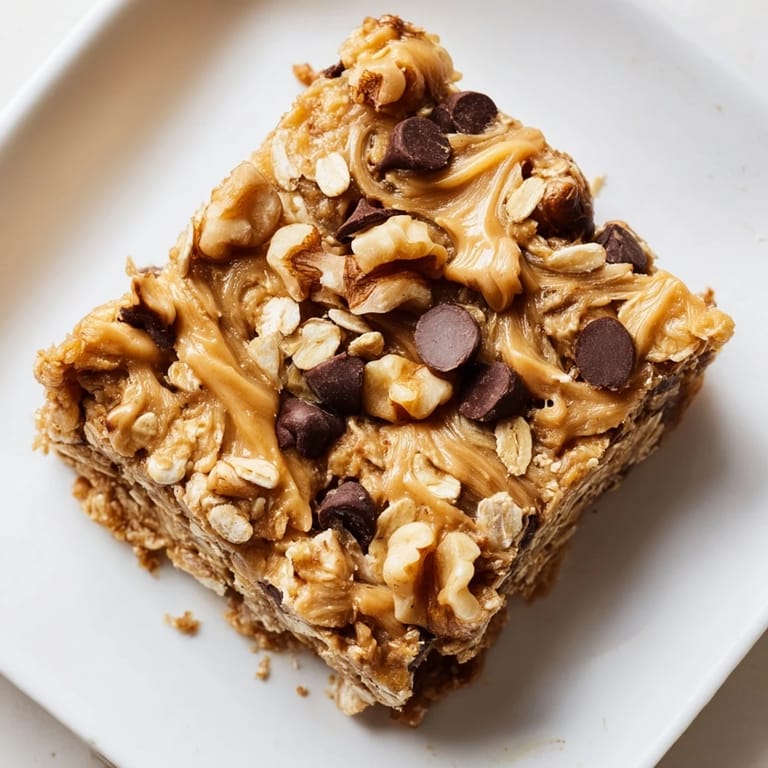
- Walnuts or pecans: Optional but worth it if you have them; they add a slight bitterness that balances the sweetness perfectly.
- Mini chocolate chips: Also optional, but I've never regretted adding them—they soften slightly as the bars chill, creating little pockets of comfort.
- Salt and cinnamon: These two make you forget you're eating something healthy; they just make everything taste like itself, but better.
Tired of Takeout? 🥡
Get 10 meals you can make faster than delivery arrives. Seriously.
One email. No spam. Unsubscribe anytime.
Instructions
- Prepare your pan:
- Line an 8x8-inch square pan with parchment paper and let some hang over the edges—this is how you'll lift the whole thing out later without wrestling with it. It takes 30 seconds and saves you ten minutes of frustration.
- Mash the bananas:
- Use a fork or a masher to break them down until mostly smooth; a few tiny lumps are fine and actually add character. You're aiming for the texture of chunky applesauce.
- Combine wet ingredients:
- Stir the peanut butter, honey, and vanilla into the bananas until you have something that looks cohesive and smells like childhood. The mixture should feel creamy but not oily.
- Mix in the dry stuff:
- Add the oats, salt, cinnamon, and any mix-ins you're using, then stir until everything is evenly coated and there are no dry oat pockets hiding at the bottom. This takes longer than you think—don't skip it.
- Press into the pan:
- Transfer the mixture to your prepared pan and press it down firmly and evenly using the back of a spoon or a spatula. You want it compact enough to hold together but not so tight it becomes dense—there's a sweet spot and you'll feel it.
- Chill until firm:
- Refrigerate for at least an hour; overnight is even better because it makes the bars easier to cut clean. The cold time is non-negotiable; it's what transforms the mixture from paste into snack.
- Cut and store:
- Use the parchment overhang to lift everything out, then slice into 12 bars with a sharp knife—a quick dip in warm water between cuts keeps the knife clean and the edges neat. Keep them in an airtight container in the fridge where they'll stay fresh for a week.
 Save to Pinterest
 There was a moment last winter when I brought these to a potluck and watched someone take a bite, eyes widening like they'd expected something store-bought or complicated. When they asked what was in them and I listed five ingredients off the top of my head, their face fell a little—as if simplicity meant it couldn't possibly be good. Then they took another bite and stopped asking questions. That's when I understood these bars aren't impressive because they're hard to make; they're impressive because they taste intentional.
Make-Ahead Wisdom
These are your secret weapon for busy mornings and last-minute guests because you can make them days in advance. I've assembled five batches on a Sunday and portioned them out through the week—the fridge stays organized and you always have something to grab that doesn't feel like a lazy choice. They freeze beautifully too; wrap them individually and they'll keep for two months, ready whenever you need a small miracle that takes no time to prepare.
Simple Variations That Work
The base recipe is forgiving enough to bend without breaking. Swap the peanut butter for almond or sunflower seed butter if that's what you have, use brown sugar instead of honey if the sweetness feels off, or stir in dried cranberries for a tart note that cuts through the richness. I've even added a tablespoon of cocoa powder to half a batch, creating a chocolate-peanut variation that disappeared before the regular ones.
Why These Bars Never Get Boring
What started as a pantry raid turned into something I make regularly because they're reliable, wholesome, and taste like you actually cared. They travel better than homemade cookies, they don't require any special equipment, and they hit that impossible sweet spot between indulgent and energizing. Wrapped in parchment with a handwritten label, they're the kind of gift that says you were thinking of someone without being overly precious about it.
- Wrap individual bars in parchment paper and label them with the date so you know what you're reaching for at 3 a.m.
- If the mixture feels too crumbly before chilling, add a tablespoon of honey and stir again—it usually means you need slightly more binding.
- These taste better after they've been cold for a few hours, so resist the urge to cut them immediately after putting them in the fridge.
 Save to Pinterest
 This is the kind of recipe that sticks with you because it asks nothing and gives plenty. You'll find yourself making it again without planning to, reaching for these bars when you're packing a lunch or need something that feels like self-care disguised as convenience.
Recipe FAQs
- → Can I make these bars vegan?
Yes, substitute honey with maple syrup and use dairy-free chocolate chips for a vegan-friendly version.
- → How should I store the bars?
Store them in an airtight container in the refrigerator for up to one week.
- → Can I use other nut butters?
Almond or sunflower seed butter can replace peanut butter for a different flavor profile.
- → Are these bars suitable for gluten-free diets?
Use certified gluten-free oats to ensure the bars are gluten-free.
- → What optional ingredients can I add?
Chopped walnuts, pecans, mini chocolate chips, or dried fruits like cranberries and raisins can be added for extra taste and texture.