 Save to Pinterest
 The first time I attempted fresh spring rolls, my kitchen counter looked like a rice paper explosion—wrappers tearing, fillings spilling everywhere, and me wondering if I should just call it a salad. But something about that translucent wrapper, the way it holds all those vibrant flavors and textures together, kept me trying. Now these Thai basil beef rolls are my go-to when I want something that feels light but still satisfies that craving for something savory and complex.
Last summer, my sister came over for lunch and we stood at the counter rolling these together, laughing at our varying rolling techniques and debating who could make the tightest cylinder. By the time we sat down to eat, we had a beautiful platter of these translucent rolls, each one slightly imperfect but bursting with flavor. She still asks me to make them whenever she visits, claiming theyre better than anything shes had in restaurants.
Ingredients
- 1 lb ground beef (85–90% lean): The fat content here matters—too lean and the beef mixture feels dry in the rolls
- 1 tbsp neutral oil: Canola, vegetable, or peanut oil all work beautifully for high-heat stir-frying
- 3 cloves garlic, minced: Fresh garlic is non-negotiable here—jarred garlic lacks the aromatic punch we need
- 1 small shallot, finely minced: Shallots give a sweeter, more delicate flavor than onions
- 2 Thai birds eye chilies, finely minced: Adjust these to your heat tolerance—they pack serious punch
- 1 small red bell pepper, finely diced: Adds sweetness and a pop of color throughout the beef
- 3 green onions, thinly sliced: Separate white and green parts—they go in at different times
- 1 cup fresh Thai basil leaves, roughly chopped: This is the star flavor driver—Italian basil works but Thai is worth seeking out
- 1 tbsp fresh lime juice: Added at the very end to brighten everything up
- 1 1/2 tbsp soy sauce: Use gluten-free if needed—this provides the salty base
- 1 tbsp fish sauce: Dont be intimidated, it creates that deep umami backbone
- 1/2 tbsp oyster sauce: Adds subtle sweetness and body to the sauce
- 1 tsp dark soy sauce: Optional, but gives the beef that gorgeous caramel color
- 2–3 tsp brown sugar or palm sugar: Balances all the salty elements perfectly
- 12–16 large rice paper wrappers: The 22 cm size is ideal—smaller ones make rolling frustrating
- 1 1/2 cups cooked jasmine rice or vermicelli: The filling needs this base for substance
- 1 cup each shredded lettuce, julienned cucumber and carrots: These create the essential crisp texture contrast
- 1 cup each fresh cilantro, Thai basil, and mint leaves: The herb trio is what makes these taste truly Thai
- 3 tbsp fish sauce, 3 tbsp lime juice, 1 1/2 tbsp sugar, 2 1/2 tbsp water: The golden ratio for dipping sauce perfection
- 1 clove garlic, very finely minced: Grate it for the sauce to avoid big chunks
- 1–2 Thai chilies, thinly sliced: Let guests adjust heat by how much they dip
Tired of Takeout? 🥡
Get 10 meals you can make faster than delivery arrives. Seriously.
One email. No spam. Unsubscribe anytime.
Instructions
- Mix the sauce seasoning:
- Combine soy sauce, fish sauce, oyster sauce, dark soy sauce, and sugar in a small bowl, stirring until the sugar completely dissolves. Add water as needed to reach a glossy, pourable consistency—this is going to coat every bite of beef.
- Build the flavor base:
- Heat oil in a large skillet or wok over medium-high heat, then add garlic and shallot, stirring constantly for 30–45 seconds until fragrant and just beginning to turn golden. Watch closely—garlic can go from perfect to burnt in seconds.
- Add heat and aromatics:
- Toss in minced chilies and the white parts of the green onions, stir-frying for 20–30 seconds until the kitchen fills with that spicy, aromatic steam. This is when your nose tells you good things are coming.
- Cook the beef:
- Add ground beef to the hot pan, breaking it apart with your spatula as it cooks. Let it brown in spots for 4–6 minutes, stirring frequently—those crispy edges add so much flavor.
- Soften with peppers:
- Add diced red bell pepper and cook for 2–3 minutes until slightly softened but still retaining some crunch. The sweetness from the pepper balances the beef beautifully.
- Coat with sauce:
- Pour that sauce seasoning you made earlier over the beef, tossing to coat everything evenly. Let it cook for 2–3 minutes more, allowing the sauce to reduce and cling to the meat like a glaze.
- Finish with herbs:
- Reduce heat to low and add chopped Thai basil and green parts of green onions, tossing just until the basil wilts—about 30–45 seconds. Turn off the heat and stir in lime juice, then let the mixture cool completely before rolling.
- Whisk together the dipping sauce:
- Combine fish sauce, lime juice, sugar, and warm water in a bowl, stirring until sugar dissolves completely. Add garlic, chilies, carrot, and herbs, then taste and adjust until you hit that perfect salty-sour-sweet-spicy balance.
- Set up your rolling station:
- Fill a large shallow dish with warm—not hot—water and have a clean board or plate ready, optionally lightly oiled to prevent sticking. Arrange all your fillings in bowls so everything is within arms reach.
- Soften the rice paper:
- Dip one wrapper in warm water for 3–5 seconds, rotating to moisten all sides, then place on your board. It will continue to soften as you work—over-soaking is the most common mistake.
- Layer your fillings:
- Place 2–3 tbsp cooled rice or noodles on the bottom third of the wrapper, followed by 2–3 tbsp beef mixture, then strips of cucumber and carrot, a handful of lettuce, and generous pinches of fresh herbs.
- Roll it tight:
- Fold the bottom edge over the filling, fold in the sides, then roll tightly away from you like a burrito, keeping tension for a neat cylinder. Place seam-side down on your plate and repeat with remaining wrappers.
- Serve with style:
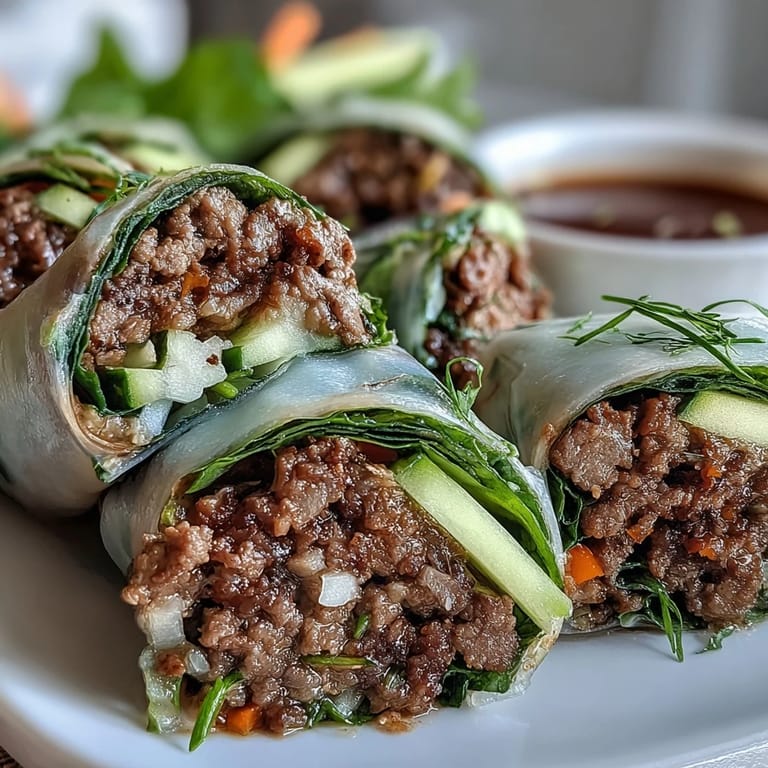
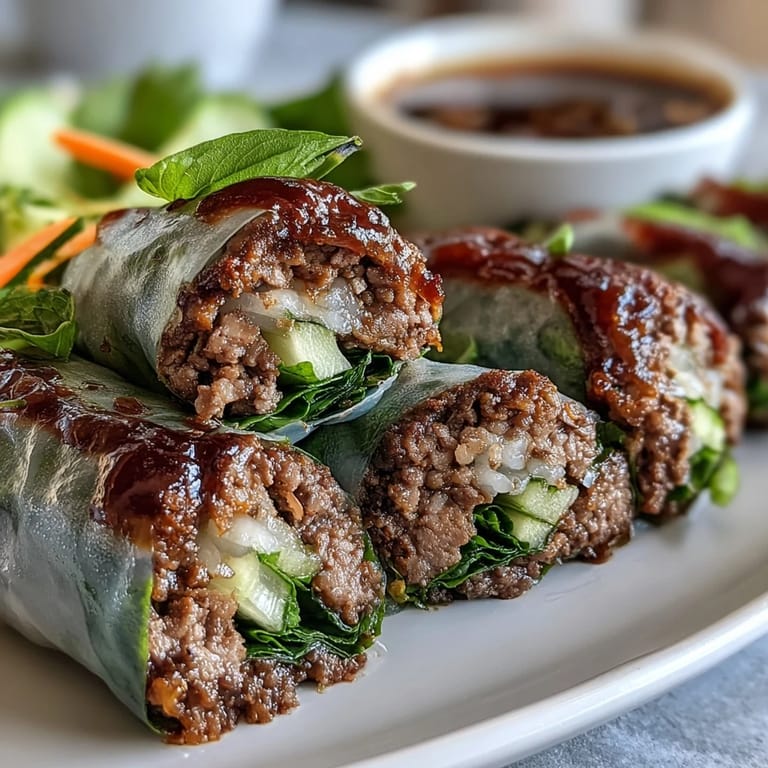
- Leave rolls whole or slice diagonally for a dramatic presentation, arranging them on a platter with the dipping sauce alongside. If not serving immediately, cover with a damp towel and plastic wrap—theyre best within a few hours.
 Save to Pinterest
 These rolls have become my secret weapon for summer gatherings—they look impressive but are actually quite forgiving once you get the hang of the rolling technique. Theres something so satisfying about biting through that soft wrapper into layers of savory beef, crisp vegetables, and aromatic herbs all at once.
Getting the Rice Paper Right
I learned through many failed attempts that warm water is far better than hot for softening rice paper—hot water makes them too soft too quickly. Work with just one wrapper at a time until you feel confident, and dont worry if your first few rolls look messy. They will still taste incredible, and you will get faster with practice.
Make-Ahead Magic
The beef filling actually develops more flavor if made a day ahead and stored in the refrigerator. You can also prep all your vegetables and mix the dipping sauce the night before, leaving only the assembly for the day you plan to serve. Just bring everything to room temperature before rolling for the best texture.
Customizing Your Rolls
Once you master the basic technique, these rolls are endlessly adaptable. Try swapping in ground chicken or turkey, or add sliced avocado for creaminess. The key is keeping the components separate until the very last moment so each roll stays fresh and vibrant.
- Leftover beef filling makes incredible fried rice or lettuce wraps the next day
- If serving a crowd, consider setting up a roll-your-own station for interactive fun
- Room temperature rolls taste better than cold ones, so let them sit out for 10–15 minutes before serving
 Save to Pinterest
 There is something so refreshing about food you can eat with your hands, each bite a perfect little package of flavors. These rolls never fail to make me feel like summer has arrived, no matter what the calendar says.
Recipe FAQs
- → How long do Thai basil beef rolls stay fresh?
These rolls are best enjoyed immediately. If storing, cover with a damp towel and plastic wrap, then refrigerate for up to 2-3 hours. Let them sit at room temperature for 10-15 minutes before serving to soften the rice paper.
- → Can I make the beef filling ahead of time?
Yes, prepare the beef filling up to 24 hours in advance and store it refrigerated in an airtight container. Bring to room temperature before rolling to prevent condensation from making the rice paper soggy.
- → What can I substitute for Thai basil?
Italian basil combined with fresh mint makes a good substitute. Thai basil has a distinct anise-like flavor, so adding a small amount of star anise or cinnamon to the cooking beef can help mimic that profile.
- → How do I prevent rice paper from tearing?
Use warm (not hot) water and dip briefly for 3-5 seconds. The paper continues softening as you work. Lightly oiling your work surface helps prevent sticking. Handle gently and avoid overfilling.
- → Are these rolls gluten-free?
They can be made gluten-free by using tamari instead of soy sauce, gluten-free oyster sauce, and verifying all condiments are certified gluten-free. Rice paper wrappers are naturally gluten-free.
- → Can I use different proteins?
Ground turkey, chicken, or pork work well as substitutes. For a lighter version, use extra-lean beef. Cooking times may vary slightly depending on the protein chosen.