Save to Pinterest
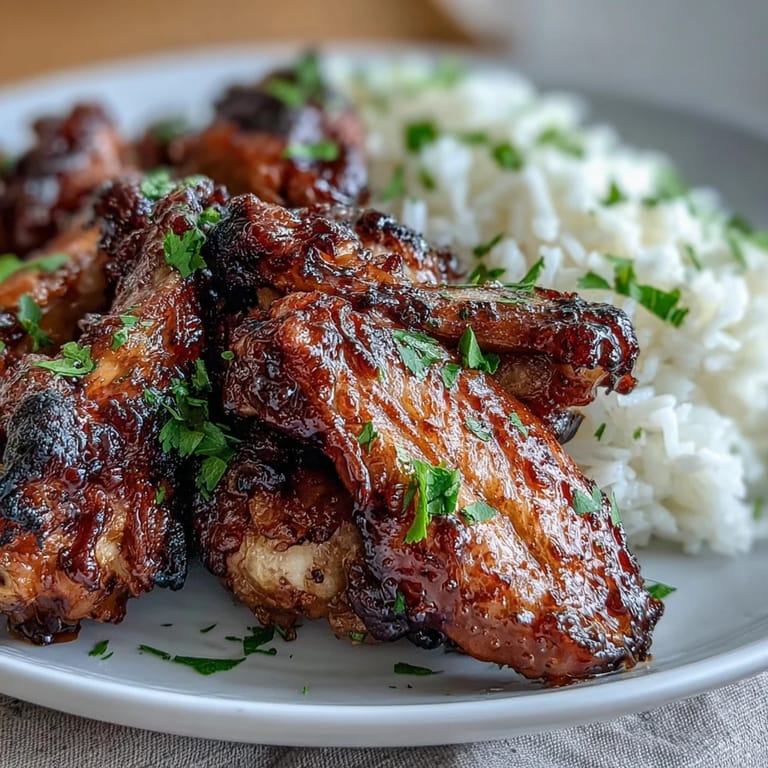
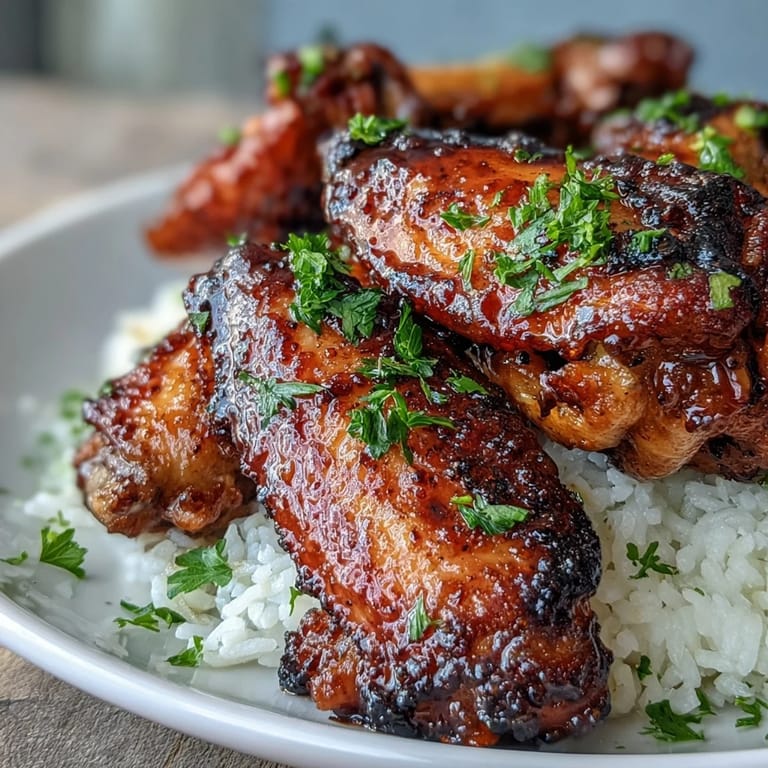
 My neighbor showed up one Sunday afternoon with a plate of these honey garlic wings still warm from her oven, and I immediately understood why she kept them so close to her chest. The sticky, caramelized coating caught the light like amber, and one bite told me everything about why this dish had become her secret weapon for feeding a crowd. Years later, I've made them countless times, each batch reminding me that sometimes the simplest recipes are the ones people actually want to eat.
I made these the night my brother came home from his first semester away, and watching him eat in complete silence told me more than any conversation could have. My mom kept offering him seconds, and my dad kept sneaking wings when he thought no one was looking, which is basically his love language.
Ingredients
- Chicken wings (1.5 lbs, split and tips removed): Splitting and removing tips is worth the five minutes it takes—you get better seasoning coverage and crispier edges throughout the wing.
- Olive oil (1 tbsp): Just enough to help the seasonings stick and give you that crucial browning in the oven.
- Kosher salt (1 tsp), black pepper (1/2 tsp), smoked paprika (1/2 tsp), garlic powder (1/2 tsp): This spice blend is your insurance policy against bland wings—don't skip the smoked paprika, it adds depth you didn't know you needed.
- Honey (1/3 cup): Use a good quality honey if you can; it makes a noticeable difference in the final sauce.
- Low-sodium soy sauce (1/4 cup): Low-sodium matters here because the sauce concentrates as it thickens, and you don't want oversalted wings.
- Unsalted butter (3 tbsp for sauce, 2 tbsp for rice): Butter is doing the heavy lifting in both components, so don't swap it for anything else.
- Garlic (4 cloves, finely minced): Mince it small so it distributes evenly throughout the sauce and doesn't overpower any single bite.
- Ketchup (2 tbsp): This is the secret ingredient that nobody expects; it adds subtle sweetness and helps the sauce stick to the wings.
- Apple cider vinegar (1 tbsp): The acid cuts through the richness and brightens the whole sauce.
- Chili flakes (1/2 tsp, optional): I usually add them because life is short and heat is good, but you don't have to.
- Cornstarch slurry (1 tbsp cornstarch mixed with 1 tbsp water): This thickens the sauce from runny to clinging-to-wings perfect—don't skip it.
- Long-grain white rice (1 cup): It stays fluffy and absorbs the sauce without getting mushy.
- Low-sodium chicken broth (2 cups): Homemade is ideal, but good store-bought works just fine.
- Fresh parsley (2 tbsp chopped): A handful of parsley at the end makes the whole dish look intentional and tastes fresher.
Tired of Takeout? 🥡
Get 10 meals you can make faster than delivery arrives. Seriously.
One email. No spam. Unsubscribe anytime.
Instructions
- Heat the oven and set up your stage:
- Get your oven to 425°F and line a baking sheet with foil, then place a wire rack on top and lightly grease it. This setup is what separates crispy wings from soggy ones—the air circulation underneath does the real work.
- Dry and season your wings:
- Pat the wings completely dry with paper towels (moisture is the enemy of crispiness), then toss them in a bowl with olive oil, salt, pepper, smoked paprika, and garlic powder until every piece is coated. Take your time here because this seasoning is your foundation.
- Roast until golden:
- Build your sauce while wings cook:
- Melt butter in a small saucepan over medium heat, add minced garlic, and let it smell incredible for about a minute. Pour in honey, soy sauce, ketchup, vinegar, and chili flakes, then simmer until it smells like candy and savory had a beautiful argument.
- Thicken and finish the sauce:
- Whisk in your cornstarch slurry and stir constantly for a minute or two until the sauce coats the back of a spoon and stays there. You'll know it's right when it looks glossy and thick.
- Cook your rice on autopilot:
- Bring broth, butter, and salt to a boil, stir in rice, cover, reduce heat, and let it sit undisturbed for 18 minutes. After 5 more minutes of resting, fluff with a fork and it'll be perfect.
- Toss wings in glorious sauce:
- Transfer baked wings to a bowl and pour sauce over them, then toss until every wing is glossy and coated. This is the satisfying part.
- Plate and serve:
- Pile rice on plates, arrange wings on top, drizzle with extra sauce, and scatter parsley everywhere. Serve immediately while everything is still warm.
 Save to Pinterest
 There's a moment, right when you pull those wings out of the oven and they're glistening under the kitchen light, when you know you made something worth remembering. That's the moment I always text my neighbor to tell her thanks for changing how I cook.
Why This Works Every Single Time
The combination of honey, soy sauce, and vinegar creates a sauce that's not just sweet—it's balanced and complex, which is why your guests will ask for the recipe three times before you're done eating. The cornstarch slurry ensures the sauce clings instead of sliding off, and baking on a rack means hot air circles the wings, making them crispy without any oil beyond that first light coat. Rice soaks up every bit of sauce that falls, so nothing gets wasted.
Making These Work for Your Kitchen
If you're worried about timing, start the rice first and let it sit covered while your wings bake—they'll both be done at nearly the same moment. You can prep the sauce ingredients ahead of time, measuring everything into small bowls, so assembly becomes just melting butter and combining flavors. The whole dish comes together in just over an hour, which means you can actually serve hot food to hungry people instead of apologizing for timing.
Small Tweaks That Change Everything
Sometimes I'll add a dash of liquid smoke to the sauce if I want that smoky depth, and a few times I've whispered in a tiny bit of sesame oil for earthiness. Brown rice or quinoa works beautifully if you're looking for whole grains, though you might need to adjust liquid and cook time slightly. The wings pair unexpectedly well with both beer and wine—a crisp lager handles the richness while a chilled Riesling plays off the sweetness.
- For ultra-crispy wings, don't overcrowd the pan and give them space to breathe.
- If your sauce thickens too much, whisk in a splash of broth to loosen it back up.
- Make extra sauce because someone will want it on the side for dipping.
 Save to Pinterest
 This is the kind of dish that makes people feel cared for without you having to spend all day in the kitchen. Serve it warm, watch people smile, and remember that sometimes the best meals are the ones that taste like effort but take barely an hour.
Recipe FAQs
- → How do I get the crispiest chicken wings?
Pat wings thoroughly dry with paper towels before seasoning. Arrange them in a single layer on a wire rack over a baking sheet, which allows hot air to circulate all around. Bake at 425°F until golden and flip halfway through for even crisping.
- → Can I make the honey garlic sauce ahead of time?
Yes, prepare the sauce up to 2 days in advance and store it in an airtight container in the refrigerator. Reheat gently on the stove, adding a splash of water if it has thickened too much, before tossing with the cooked wings.
- → What sides pair well with these wings?
Buttery rice is the perfect complement to soak up the sticky glaze. For a lighter option, serve with steamed broccoli or roasted vegetables. A crisp green salad with vinaigrette helps balance the sweetness of the sauce.
- → Can I use chicken drumettes or thighs instead?
Absolutely. Drumettes work beautifully with the same cooking time. For chicken thighs, increase baking time to 25-30 minutes or until they reach 165°F internally. Adjust sauce quantity accordingly to coat all pieces evenly.
- → How do I store and reheat leftovers?
Store cooled wings and rice separately in airtight containers for up to 3 days. Reheat wings in a 375°F oven for 10-15 minutes to restore crispiness, or microwave in 30-second intervals. The rice reheats well in the microwave with a splash of water.
- → Can I make this gluten-free?
Use tamari or coconut aminos instead of soy sauce, and ensure your chicken broth is certified gluten-free. The cornstarch slurry is naturally gluten-free, making this dish easily adaptable for gluten-sensitive diners.